Imagine unpacking a box of ornaments and discovering those shimmering stones that shift between blue and gold when tilted in your palm. You remember how they looked magnificent online, but now you're facing a tree wondering how to recreate that magic. I once watched someone spend hours arranging these gems only to have some clump awkwardly while others vanished in the shadows. That frustration sparked this article - we'll untangle the process through a practical checklist. Instead of overwhelming advice, you'll get focused techniques that work with physics, not against it. Consider these insights shortcuts to transforming your tree into a living light show, where each stone's hidden spectrum becomes visible drama.
This foundation transforms random hanging into intentional design. When you know why labradorite reacts to specific lighting conditions, placement becomes purposeful rather than guesswork. Forget "more is better" - strategic positioning lets each ornament contribute to the overall spectacle.
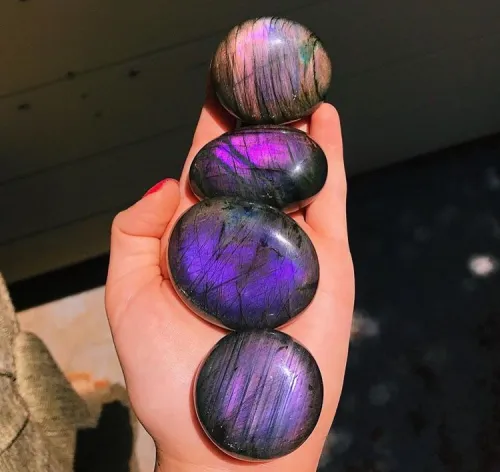
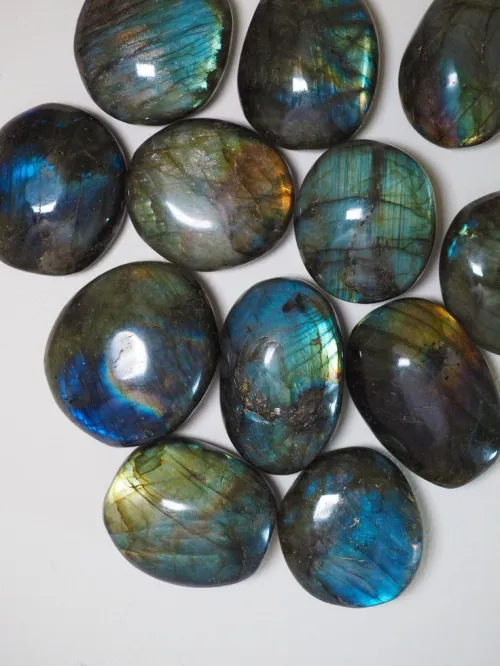
Picture this: You're rotating an ornament near a window. Suddenly, sunlight hits at 30 degrees and unleashes a turquoise flash. This isn't magic - it's schiller effect physics where light refracts through internal crystal layers. The stone must face sufficient light sources to activate this display. Ornaments with polished surfaces perform best since smoother textures allow clearer light penetration. For consistent results, hang pieces where ambient illumination naturally reaches - typically near tree perimeters rather than deep within dense foliage.
A friend once complained her labradorite decorations "disappeared" at night until she swapped warm white bulbs for cool LEDs. The bluish undertones in cooler lighting ignited color play that warm tones muted. Position pieces within 12 inches of bulbs without direct front-lighting which flattens the effect. Notice how ornaments demonstrate different personalities depending on light source distance: Closer placements intensify color saturation while distant locations emphasize subtle shimmer. Rotating pieces by 15-degree increments finds the sweet spot where internal fractures catch and redirect illumination most dramatically.
Here we shift from science to artistry. Strategic spacing prevents visual clutter while making the entire tree participate in the spectacle. Keep in mind humans perceive closer objects more vividly - we'll leverage that depth perception to amplify your display.
Think of your tree as having three performance zones: Front-stage ornaments near viewers (place bold statement pieces here), mid-stage at tree midsection (build color layers), and backstage near the trunk (use smaller accents). Before hanging anything, lay ornaments on a table sorted by size and dominant color. Install largest pieces first as anchor points, spacing them evenly like visual waypoints. Then fill gaps with medium ornaments, avoiding perfect symmetry which feels artificial. Notice how weight distribution matters - branches may support heavier ornaments near stronger central trunks rather than delicate outer tips.
Imagine attaching decorations at slightly different depths: Some dangle prominently on branch tips while others nestle deeper within needles. This creates a "treasure hunt" effect where new color flashes appear as viewers move around the tree. Try these practical cues:
Security might not feel glamorous until decorations start falling. Labradorite's moderate heft requires thoughtful hanging compared to lightweight baubles. The goal? Effortless beauty that withstands bumps, pets and time.
During one holiday party, a beautifully hung ornament crashed down because a thin branch bent under its weight. To avoid similar mishaps, hang heavier pieces where branches grow perpendicular to the trunk - these provide natural support ledges. Verify attachment points using this test: After securing an ornament’s hanging loop to a branch, gently nudge it sideways. Properly secured pieces swing softly without sliding or turning upside down. Smooth polished surfaces actually help here, preventing accidental snags when placing decorations among needles. Remember that standard cord loops typically accommodate hooks and ribbons below 3mm thickness.
Picture returning after vacation to ornaments faded by sun exposure. Non-porous material inherently resists permanent damage, but indirect sunlight maintains brilliance best throughout the season. Position stones away from south-facing windows where UV exposure concentrates. Humidity causes few issues thanks to moisture resistance - ornaments withstand normal indoor variations better than wood decorations. If storing for next year, wrap pieces in soft cloth to maintain polished finishes against accidental scratches. You might notice temperature shifts causing metal hooks to contract slightly – this rarely affects attachments but confirms why avoiding direct heat sources matters.
Three principles ensure success: Place deliberately to catch light, secure thoughtfully to preserve branches, and arrange dimensionally for discovery. Next time you unwrap these treasures, remember - the magic happens where preparation meets opportunity. What lighting angles might you test before securing that first ornament? Which branch intersections create unexpected viewing platforms? Apply these principles to transform yearly tradition into interactive artistry.
Q: How many labradorite ornaments should I use?
A: Density depends on tree size and light penetration. Start with 15–20 pieces for a 7-foot tree, adjusting based on visibility gaps as illumination may highlight fewer pieces effectively.
Q: Can these decorations withstand fireplace heat?
A: While resistant to moderate temperature fluctuations, maintain a safe distance from direct heat sources which can accelerate material stress over multiple seasons.
Q: Will artificial trees showcase labradorite differently?
A: Synthetic foliage provides consistent backdrop coloring and often more hanging flexibility, though the material interacts similarly with light sources when secured properly.

$